With growing interest in wellness and heat therapy, building a traditional sauna at home is no longer a luxury—it’s a smart investment in long-term health. Traditional saunas offer deep relaxation, improved circulation, detoxification, and cultural authenticity. But to replicate the experience properly, you’ll need more than just heat—you’ll need the right materials, layout, and systems.
This article walks you through each phase of setting up a traditional sauna at home, from planning and design to installation and safety.
1. Choose the Right Location
Your first decision is whether the sauna will be indoor or outdoor.
Indoor Sauna:
- Typically installed in a bathroom, basement, or spare room
- Easier to insulate and access in cold climates
- Requires proper moisture barriers and ventilation
Outdoor Sauna:
- Freestanding or part of a garden structure
- Offers natural contrast for cold exposure (snow, plunge)
- Requires weatherproofing and a stable foundation
Tip: Choose a quiet, private space that allows for good airflow and easy access to water and electricity (or firewood).
2. Determine Sauna Dimensions and Capacity
Standard home saunas typically seat 2–6 people. Popular sizes:
| Capacity | Recommended Size |
|---|---|
| 2-person | 4’ x 5’ (1.2m x 1.5m) |
| 4-person | 6’ x 6’ (1.8m x 1.8m) |
| 6-person | 6’ x 8’ (1.8m x 2.4m) or larger |
- Wall height should be at least 6.5–7 feet to ensure heat stratification.
- Include room for bench tiers, a heater, and clear walking space.
3. Select the Right Wood
Sauna wood must handle heat, moisture, and direct contact.
Best wood choices:
- Western Red Cedar: Aromatic, rot-resistant, premium
- Nordic Spruce: Traditional look, low resin
- Aspen: Hypoallergenic, smooth, scent-free
- Thermo-Aspen or Thermo-Pine: Enhanced stability and longevity
Avoid:
- Treated lumber (off-gassing risk)
- Pine with sap (resin leakage)
- Hardwoods that overheat (e.g., oak)
Use untreated wood for benches, walls, ceilings, and accessories.
4. Select the Heating Method
Traditional saunas are heated with either:
Wood-burning Stove:
- Authentic and off-grid
- Requires chimney or flue
- Slower warm-up (~45 minutes)
- Ideal for outdoor saunas
Electric Sauna Heater:
- Faster warm-up (20–30 minutes)
- Thermostat control
- Requires 240V dedicated circuit
- Best for indoor saunas
Ensure your stove or heater is sized correctly for your sauna’s volume (measured in cubic feet/meters). Manufacturers typically provide sizing charts.
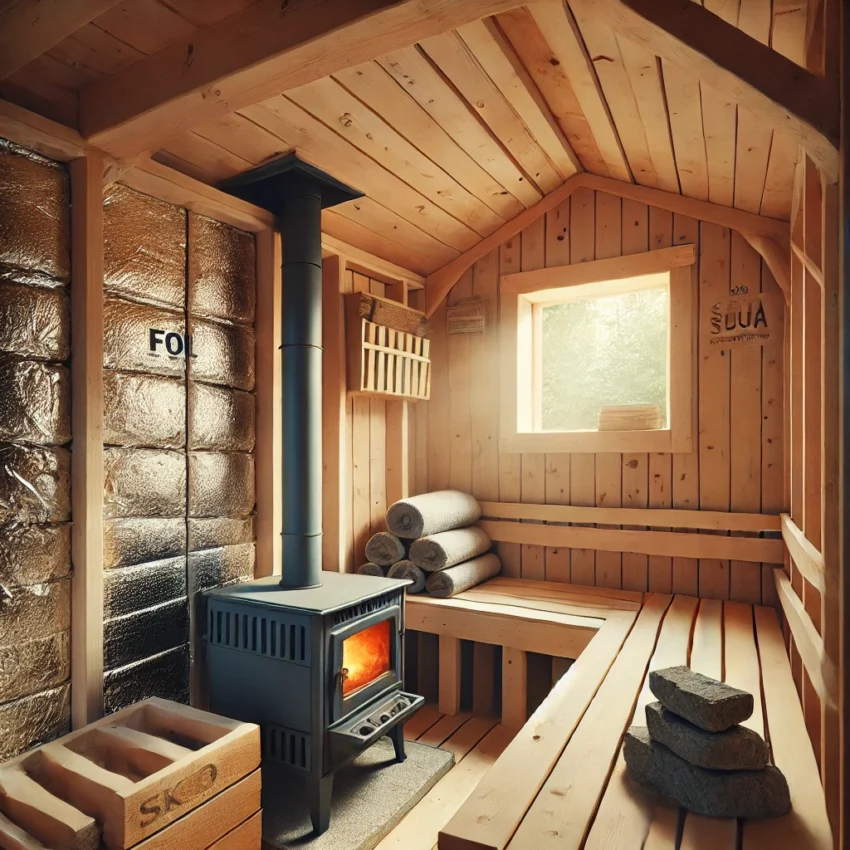
5. Insulation and Vapor Barrier
Proper insulation keeps heat in and energy use low.
- Use R-11 or R-13 fiberglass in walls and R-19 or higher in ceilings
- Install a foil-backed vapor barrier on the warm side (sauna interior) to reflect heat
- Tape all seams with aluminum tape for airtight seal
Ceilings lose the most heat—prioritize insulation here.
6. Interior Layout and Bench Construction
Traditional saunas use multi-tiered benches for temperature variation:
- Upper bench: Higher temp, ideal for short sessions
- Lower bench: Cooler zone for longer comfort
Bench materials:
- Same wood as sauna interior
- Use rounded edges, no exposed screws
- Allow air circulation underneath
Include a backrest, footrest, and enough room to lie down or recline.
7. Ventilation is Essential
Every sauna needs controlled airflow to regulate oxygen and humidity.
- Install an intake vent near the heater (~4–6 inches above the floor)
- Place an exhaust vent on the opposite wall, near the ceiling
- Use passive or adjustable vents to fine-tune airflow
Poor ventilation leads to mold, discomfort, and inefficient heating.
8. Electrical and Lighting
All electrical components should be sauna-rated and moisture-safe.
- Use vapor-proof light fixtures (interior and exterior)
- Install a timer, thermostat, and overheat protection
- Include a low-wattage LED light for ambiance
- Place controls outside the sauna unless rated for high heat
Note: Hire a licensed electrician to install sauna heaters and lighting safely.
9. Accessories and Final Touches
To complete the traditional experience, add:
- Sauna stones: Place over heater, used for steam (löyly)
- Water bucket & ladle: For pouring water on stones
- Thermometer & hygrometer: Monitor heat and humidity
- Towels & seat covers: Protect benches and skin
- Aromatics (optional): Natural oils or birch bundles for added tradition
10. Safety and Maintenance Tips
- Use a non-slip floor surface and water-resistant materials
- Keep water away from electrical components
- Clean benches regularly with mild soap and water
- Air out sauna after each session to prevent mold
- Install smoke detectors and ventilation fans for indoor builds
Conclusion: A Sauna That Reflects You
Building a traditional sauna at home combines practical skill with cultural respect. By using proper materials, following structural guidelines, and prioritizing comfort and safety, you create a space that offers far more than heat—it offers ritual, reflection, and renewal.
Whether you choose an indoor cedar retreat or an outdoor wood-fired cabin, a well-built sauna becomes a lifelong source of wellness.